
Metal roofing has become an increasingly popular choice for homeowners due to its durability, energy efficiency, and modern appeal. If your current shingle roof is aging but still structurally sound, you might be wondering if you can install metal roofing over it instead of tearing everything off. The good news? You can! Installing metal roofing over shingles is a cost-effective and time-saving approach—if done correctly.
At Great Lakes Building Concepts, we’ve helped countless homeowners upgrade to metal roofing while avoiding the mess and expense of a full tear-off. In this guide, we’ll walk you through the process, key considerations, and expert tips to ensure a successful installation.
Why Install Metal Roofing Over Shingles?
Many homeowners assume that replacing a roof means removing the old one, but in some cases, you can install metal roofing directly over shingles. Here’s why it’s a great option:
- Saves Time and Money – A full tear-off adds labor and disposal costs. Keeping your shingles intact reduces the project timeline and overall expense.
- Enhances Insulation – The extra layer provides added insulation, improving your home’s energy efficiency.
- Eco-Friendly – Less waste means fewer shingles ending up in landfills.
- Boosts Durability – Metal roofing lasts 40-70 years, far longer than traditional asphalt shingles.
While this method works well in many cases, it’s important to assess your existing roof’s condition before moving forward.
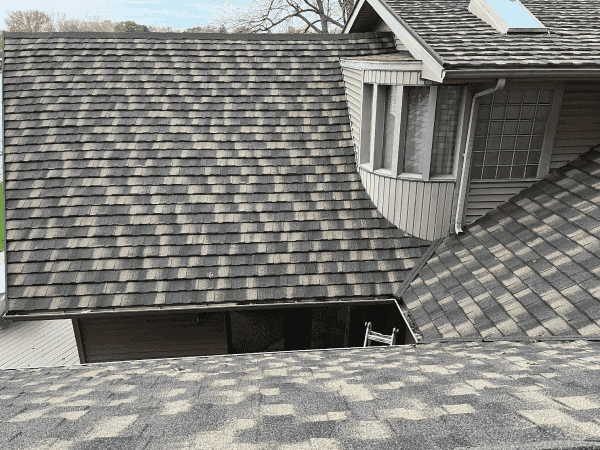
Step 1: Inspect Your Existing Roof
Before installing metal roofing, check your current shingle roof for these key factors:
- Structural Integrity – The roof deck must be in good condition with no sagging, rotting, or moisture damage.
- Shingle Layers – Most building codes allow metal roofing over one layer of shingles. If you have multiple layers, you may need to remove them first.
- Local Building Codes – Always check with your local municipality to confirm regulations on installing metal roofing over shingles.
If your existing shingles are curling or severely damaged, it may be best to consult a roof replacement company to assess whether a full tear-off is needed.
Step 2: Install a Moisture Barrier
While metal roofing is excellent at shedding water, you still need an underlayment to prevent moisture buildup. The best options include:
- Synthetic Underlayment – Lightweight, water-resistant, and easy to install.
- Roofing Felt – An affordable option, though less durable than synthetics.
- Peel-and-Stick Membrane – Provides maximum protection against leaks, especially in areas prone to heavy rain or snow.
Secure the underlayment with roofing nails or staples, ensuring it covers the entire roof surface.
Step 3: Add Furring Strips (Optional, But Recommended)
Furring strips, also called battens, create an air gap between the metal and shingles. This improves ventilation, reduces heat buildup, and prevents condensation issues. Here’s how to install them:
- Use 1×4 or 2×4 boards.
- Nail or screw them horizontally across the roof, spaced about 24 inches apart.
- Ensure they are level and securely fastened to the roof deck.
Furring strips also provide a stable surface for attaching metal panels, reducing the risk of fastener loosening over time.
Step 4: Measure and Cut Metal Panels
Accuracy is key when working with metal roofing. Follow these steps:
- Measure from the eaves to the ridge to determine the panel length.
- Use tin snips, a circular saw with a metal-cutting blade, or shears to cut panels to size.
- Allow for Overhang – Leave about 1-2 inches of overhang at the edges for water runoff.
Always wear gloves and protective eyewear when cutting metal panels to prevent injury.
Step 5: Install the Metal Panels
Now comes the main event—attaching the metal panels! Follow this process:
- Start at One Edge – Begin at the eaves and work your way up.
- Overlap Panels – Follow manufacturer recommendations for panel overlap (usually 1-2 inches).
- Secure with Screws – Use corrosion-resistant roofing screws with rubber washers, fastening them into the raised ridges to prevent leaks.
- Check for Alignment – Make sure each panel lines up correctly before securing the next one.
Step 6: Add Flashing and Trim
To protect vulnerable areas, install:
- Ridge Cap Flashing – Covers the peak of the roof, preventing water entry.
- Eave and Rake Trim – Seals edges for a clean look and added durability.
- Valley Flashing – Directs water safely off the roof.
Proper flashing is essential for long-term performance, so don’t rush this step!
Common Questions About Installing Metal Roofing Over Shingles
Will Metal Roofing Make My House Hotter?
No. In fact, metal roofing reflects sunlight, reducing heat absorption. Paired with proper ventilation, it can keep your home cooler than traditional asphalt shingles.
Does Metal Roofing Require More Maintenance?
Not at all. Metal roofing requires minimal upkeep—just occasional inspections and debris removal to ensure optimal performance.
Is Metal Roofing Noisy in the Rain?
With a solid underlayment and insulation, metal roofing is not noisier than a standard asphalt roof. Many homeowners find the sound soothing!
Upgrade Your Roof with Confidence
Installing metal roofing over shingles is a smart investment that enhances your home’s protection, efficiency, and curb appeal. If you’re unsure about tackling the job yourself, Great Lakes Building Concepts is here to help! Our experienced team ensures every roof is installed with precision and care, so you get a beautiful, long-lasting result.
Contact us today for expert guidance or a professional installation estimate!
Name, Address and Phone
Great Lakes Building Concepts
6769 Gettysburg Dr, Hudsonville, MI, 49426, US
616-691-6633
Social Media